
A small antenna to boost the signal of a laptop wireless card, that can be stuck to the back of the laptop screen.
The design is the same as for the larger homemade antenna, but uses thin RG58 cable and is only 2 sectors long. The size was chosen so it could be housed inside the tube of an old pen, to provide rigidity and protection to the antenna.I also tried building it with even less tools than last time, so all you really need is
- 300mm (1 foot) or rg58 cable
- pen knife
- ruler
- small wirecutters
- masking tape (any adhesive tape should do)
- soldering iron and solder
The rg58 cable has a velocity factor of 0.66 , which is the same as for the rg213 cable I used to make the original larger antenna. This means that I can reuse all of the dimensions I had previously calculated of 41mm for each half wave sector and 31mm for the quarter wave whip.
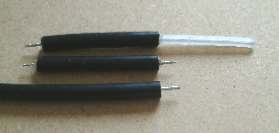
The first step is to make the 1/4 wave whip, you need to cut off 31mm of the outside covering and shielding.I've left the insulation on for now, so that the wire for the whip doesn't get too bent, while I working on the sector, but it will be removed later, just before all the sectors are soldered together.
Next up is the other end of the sector that is attached to the quarter wave whip, and the rest of the sectors (if you want more) Once joined togeter, each sector needs to be 40.5mm long, so I make the main body of each sector 37mm with 4mm of central wire sticking out each end, to be used to solder to the sectors either side.
I found the easiest way to cut the sectors was to hold the knife still and roll the cable on the worktop, so it rotates along the knife blade, cutting through the outer plastic and the wire shielding. Then carefully cut into the central insulation paying special attention to not cutting the central wire. I used the wire cutters to snip the sectors apart. You should then end up with the pieces as shown below.
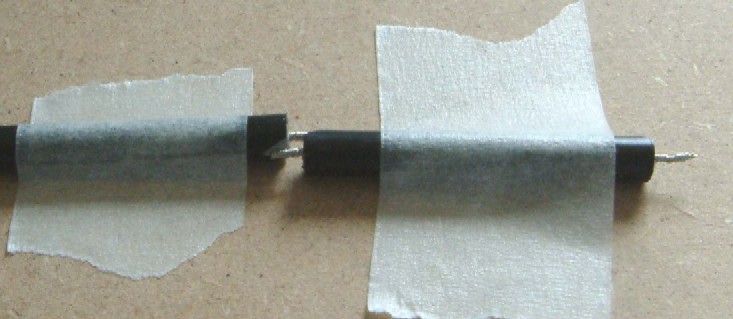
Now we just need to join all the parts together. You need to cut a small v shaped notch into the outer plastic to reveal the wire shielding below, being careful not to cut the shielding. For the larger antenna I built a custom jig to hold the pieces together while soldering, but for this small antenna I've found just taping the parts down to the surface seems adequate for the job. Remember that the overall length of each sector needs to be 40.5mm. I measure from the end of one sector to the same point on the next.
All you need now is to put a connector on the other end that is compatible with the connector on your wireless card. If you can't find a suitable connector, you may have to buy a short pigtail for your wireless card, which is a short cable designed for connecting the card to an antenna, and either put an N-connector on the end of your mini antenna, or as I did, cut up the pigtail, and solder it directly to the antenna cable. To protect your mini antenna from damage, you may want to house it in the body of an old felt tip pen. Find one that fits the assembled antenna snugly, and glue or stick them together.
Disclaimer I should point out now that I don't claim that the above design is fit for any purpose, and don't accept any liability for use of the design, or any antenna based on this design. If you want to build an antenna using this design, then you are responsible for ensuring that it doesn't breach any laws where you are, and is compatible with any hardware you connect it to. If in doubt, buy a commercial antenna.

Source: wireless.gumph.org